Showing posts with label Recipes. Show all posts

Monday, December 26, 2011

Squishy Home Made Gift

No, we are not into making green food. 

One tradition in our family at Christmas time involves making gifts.  This year my little baker and I collaborated to make play doh for a few of the little kids in our life.

I've had the recipe around for over a year and just needed the time and opportunity to make it.  I got this one from my friend Ann.  Ann is amazing.  She is the mother of four kids (two of whom are red heads...now how did she end up with red heads? I'm a little envious.  It's one of life's mysteries.)  She currently maintains two homes, getting one ready to sell.  She has boundless energy.  She makes the best chocolate cake from scratch ever. And she knows how to make play doh.

It's simple to make and really fun for the little ones in your life that are always begging to play with flour and water.

Ann assured me that the play doh from this recipe is good for two months.  We found that one batch makes enough to fill about 1 1/2 of these kind of containers. 
We made three batches, each one using a different color of jello.  I wish the colors were more vibrant.
But this is more about finger squishy fun than my color preferences.

You need these items plus some water to make the play doh. The only foreign one for me is the Alum.  "It's in the spice aisle", Ann said, after I asked what the heck is Alum?
Ingredients
1/2 cup salt
2 cups water
Kool Aid powder (We used a packet of Jello)
2 T. oil (We used Canola)
2 cups flour (We added an extra 1/2 cup to get the right consistency)
2 T. Alum

Directions
Boil salt in water in sauce pan.
Remove from heat and add Jello. Stir.
Add oil, flour and alum. (We found out that the order here matters.)
Knead until smooth.

That's it!


Wednesday, December 7, 2011

Lentil-icious

This is the only item I requested on my Christmas list from my husband.
I really want one.  I think it will make everything I cook taste absolutely fabulous. Here's hoping. I am even willing to give up precious real estate in my cupboard to give it a home.

If I don't happen to get it this year, which really is okay, I can continue to borrow my next door neighbor's when I need it. Another perk of hub life.

Anyway, last night I made the following recipe in this awesome, yet heavy, cast iron pot.  My arms got an additional workout to the one they got during my morning Pilates routine.  Yes, I am now exercising in the morning. More on that later.

I got this recipe from my friend Jen and I wish I could credit the original source. Maybe its her, I am just not sure. Sorry, Jen!

I fully anticipated much groaning and lots left in the bowls from my three kids. Lentils just usually aren't our thing. I have rarely cooked them even though I really like them.  Well, I continue to be surprised by my kids. They ate to the bottom of their bowls without one complaint. I actually think it was a "hit".  Don't tell them, but tonight we get to eat the left overs.

Very unlike it was when my mom served lentil hot dish for dinner when I was about 6 years old. Those of us kids who were old enough to eat it literally had to count down with my dad to put each bite in our little resistant mouths. I am sure now the recipe was just fine. We just hadn't acquired the taste for lentils. I mean literally the whole meal was counting down to eat every single bite.  My poor mother. Nothing like slaving over a hot stove and having your dear little children around you gagging on your food.  She's a saint.

Anyway, here's the recipe and it is good.  I doubled it, but kept the garlic and onion to its original amount and it still tasted too garlicy for me.  I also skipped the cheese garnish and served whole grain and white Ciabatta rolls with it. Another big hit.

Lentil Soup

3 strips of bacon (3 oz.) cut into ½ inch pieces
1 large onion, chopped
3 medium carrots, peeled, halved lengthwise, and cut into ¼ inch half-moons
3 garlic cloves, minced
2 Tbs. tomato paste
1 ½ cup lentils, picked over and rinsed
½ tsp. dried thyme
2 cans (14.5oz. each) reduced sodium chicken broth
1 Tbs. red wine vinegar
coarse salt and ground pepper

1.  In a Dutch oven (or other 5-quart pot with a tight fitting lid), cook bacon over medium-low heat until browned and crisp, 8 to 10 minutes.  Pour off all but 1 tablespoon fat.

2.  Add onion and carrots; cook until softened, about 5 minutes.  Stir in garlic, and cook until fragrant, about 30 seconds.  Stir in tomato paste, and cook 1 minute.

3.  Add lentils, thyme, broth, and 2 cups water. Bring to a boil; reduce to a simmer.  Cover; cook until lentils are tender, 30 to 45 minutes.

4.  Stir in vinegar, 1 tsp salt, and ¼ tsp. pepper.  Serve immediately.  Garnish with parmesan cheese.

Wednesday, November 23, 2011

Sweet Turkey

My mom posted this on our family facebook page since I am the only sibling in town this year.  It is a tradition to make them for our family Thanksgiving dinner. This year will be a smaller table, but all the more sweets for us!

"You need caramels, hershey kisses, candy corn and chocolate striped cookie. Assembly: microwave the caramels until somewhat soft (this is the trickiest part). Push the caramel on to the top of the hershey kiss. (this forms the feet of the turkey) Attach the cookie to the back of the caramel. Push the candy corn into the front of the caramel to form the turkey's nose. As you can see, the caramel has a lot to do. Happy Thanksgiving to you."

I'm thankful for a creative mom!

Thursday, April 28, 2011

Triumphant Timpano


Have you ever waited to try something for let's say 12 or 13 years? Then, you finally do it with the right people, the right equipment, and in this case, the right ingredients and it turns out splendidly?

Well, this past Sunday was not only the triumph of life over death (thanks, Jesus) but it was also the end of a long wait. And a successful end at that.

Years ago, Steve, Ben and I had brought up the idea of making timpano, an all in one Italian pasta dish made famous by appearing in one of my favorite movies Big Night.

When we were first married, Ben and I together with a few friends orchestrated a progressive dinner Big Night style. We feasted on Italian food and wine at each other's homes and ended the evening by watching the movie.

On our to-do list someday was to try out this new dish.

It requires a recipe, which we didn't have, and a 14 inch diameter enamel bowl, which we didn't have.

Now, thanks to Steve's generosity at our most recent anniversary, we own both. This book is a collection of recipes and stories of the Tucci family. Stanley Tucci, actor and director, made the film Big Night. He collaborated with his parents and another Italian chef to publish the recipes used in the movie including the one for Timpano.
So, here we were with the book, the bowl and an Easter just around the corner...a perfect storm, as Ben might say, to try this out.

We prepared both the sauce and the meatballs the day before Easter and our planned dinner.

We cut, assembled and sort of measured the rest of the filling ingredients the day of.

We followed the recipe for the dough that lines the bowl and encases the filling. We rolled it out using the formula given in the book. As you can see, our kitchen island is too small to hold the required 28 inch diameter circle of dough.
Well, I've never been one to let a simple furniture problem get in my way...so we continued.

We greased up the bowl with 2 tablespoons of real butter and then one tablespoon of olive oil.

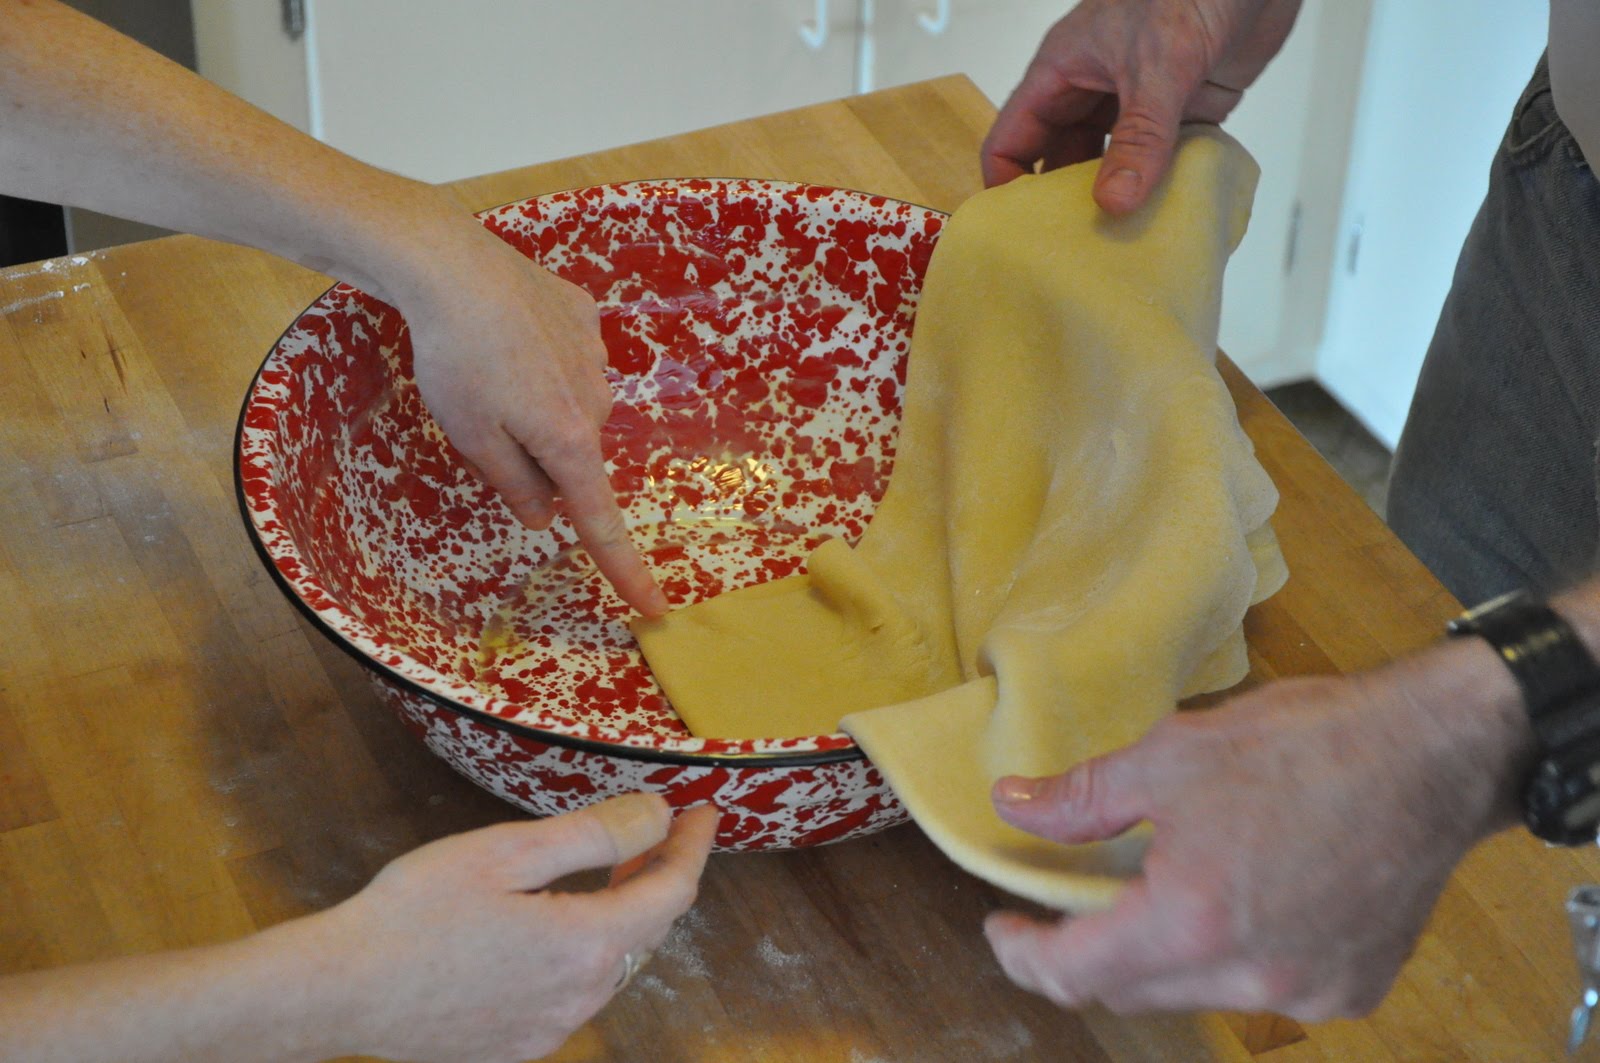
We pressed the dough ever so carefully into the bowl. First we needed to fold the circle in half, then in a triangle shape to make it easier to lift into the bowl.
The dough is paper thin and we were careful not to tear it.

Here I am pointing to the middle of the bowl attempting to be an important guide for this dough.
We draped it over the sides and then went to work layering the filling ingredients according to the book's instructions.
Triumphant Moment #1: The dough turned out perfectly...and rested in its place virtually intact.

The recipe calls for ziti pasta, but even the local Italian deli Buon Giorno did not have it, so we used 3 lbs of this instead. Close enough.
We also cut up a dozen hard boiled eggs; you can imagine how many we had given the season.

We made meatballs, as I mentioned before, although we probably made them too large. The recipe calls for 1/2 inch meatballs. But hey, they were made from scratch, with beef from our own bought cow. So there.

We grated Pecorrino Romano cheese and cut up sharp Provolone, both from the aforementioned deli.

We also cut up Genoa Salami which I purchased from Lund's.

We then tossed the pasta (cooked 1/2 the time called for on the package) with 2 cups of the homemade sauce.

With the ingredients prepared, we let the assembly begin.
Oh, our work was not completed without a little, ahem, "help".
Have you ever tried Dry Fly vodka martinis? They are to die for.

Back to the timpano...

We were completing the last layer and I read that the filling should be one inch below the rim of the bowl.
Well, we had a problem.

Luckily I had read from a blog the evening before (and we would have figured it out anyway) that you may need to compact the filling by pressing it down.

Steve used his hands.
In my kitchen, that's perfectly acceptable. I was dying to get in on the action too.

Triumphant Moment #2: All the ingredients fit.

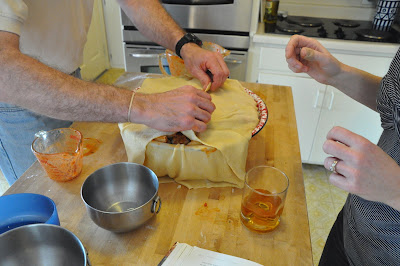
We then wrapped the dough over the top, closing up this amazing creation.
We trimmed away the excess dough and placed our first ever timpano in the oven at 350 degrees uncovered for one hour.
We had a little help while we waited.
Our friends the Willsons came over and we talked and talked and watch the timpano and talked and watched the timpano.

The dog waited too...neither talking, nor watching.
Then, we covered the timpano with tin foil, and let it cook for another 30 minutes.

We removed it from the oven and let it just sit in our presence for 30 minutes more.

It was a thing of beauty.
With bated breath, a few prayers, and more anticipation than I can usually stand, we flipped the bowl and released the timpano.
Triumphant Moment #3: The timpano remained intact, gorgeous and may I say, looking just like the picture on the cover of the book, and from what I can remember, the movie as well.

I have never cooked something that turned out just like the picture.

This was truly a new day in the making.

"It looks like a brain," Dr. Willson said.
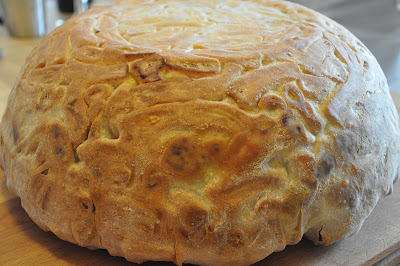
I guess I can forgive him. He reads brain scans for a living.

Now, it was waiting time again.

The recipe calls for 20 minutes of anticipation before cutting into this creation.

I think we allowed for another 45 minutes...more time for all the flavors to mix and mingle and do their wonderful Italian thing.

Meanwhile, we inspected and listened carefully...for what I have no idea, it just felt good to get close to this thing. Okay, that may be the Dry Fly talking at this point.
And then it was the moment of truth.

Carefully and with a freshly sharpened knife, Steve cut a circle in the top of the timpano. This is supposed to allow for each piece to come out more intact, not falling all over the place.

Our cut was maybe slightly too small, less than the recommended 3 inch diameters.
We didn't care. We were hungry, excited, hungry, nervous, and hungry.

Triumphant Moment #4: Timpano piece looks, smells, and tastes fabulous.

I mean, how could you not want to savor this?

My plate as it looked before I savored. Or maybe after I had a bite or two. My salad plate had been adiosed by Ben and I was ready for the main course. It was really all that was needed on my plate, a meal in and of itself.
Triumphant Moment #5: Realizing we had over half the timpano left for the next night's dinner.

And more friends to share it with.

Alleluia.

Next year, I'll provide the ingredients, you provide the "help" and we'll do this together.

Again, Alleluia.

Sunday, April 3, 2011

Mushroom Lasagna

I made this recipe on Friday night, a good meal for our 4th meatless Friday of Lent. We also had company over so I choose to make one new lasagna and another one that I could make in my sleep.

The adults and even some of the kids even liked this one!

I made some adjustments to the ingredients based on the baking dish I used and what I had in the house already.

Here is the recipe with my adjustments in blue.

Sorry. No pictures. But trust me, it is so good.

Ingredients
4 T. olive oil
3 garlic cloves, minced
2 onions, thinly sliced (1 onion)
1 pound wild mushrooms, such as porcini, oyster, shiitake, morel (1.5 pounds, a combination of baby bella and shiitake)
1/4 cup chopped Italian parsley
1 T. chopped fresh thyme (none, I didn't have any to add)
1/2 cup dry Marsala wine (2/3 cup Sweet Vermouthe)
1/4 cup butter
1/4 cup flour
1/8 t. ground nutmeg
1 cup beef or vegetable broth (chicken broth)
1 cup milk
2 cups shredded Fontina cheese (a new cheese to me to use in a recipe, soft like Gouda, but more pungent)
12 spinach lasagna noodles (regular kind, Barilla brand, that you don't have to boil first.)
1 cup shredded Mozarella
1 cup grated Parmesan


Directions
In large skillet, heat olive oil over medium-high heat. Add garlic and onions and saute, stirring ofter until tender, 6-7 minutes. Add mushrooms, parsley, and thyme and saute 5 minutes longer. Stir in wine and simmer 5 minutes. Set aside.

(By this time you will want to just eat what's in the pan and not go any further. It smells soooo good.)


In large saucepan, melt butter. Blend in flour and nutmeg (I used a wire whisk.) Cook and stir until bubbly. Gradually add broth and milk. Cook and stir until sauce boils and thickens slightly. Stir in fontina and cook until just melted. Remove from heat.


Preheat oven to 375 degrees.

In bottom of 12 x 8 inch baking dish arrange 1/3 of the lasagna noodles in a single layer. (I used a 9 x 13 inch baking dish). Spread with 1/4 of the mushroom mixture and 1/4 of the sauce. Repeat layers with remaining noodles, mushroom mixture and sauce. Sprinkle with mozzarella and Parmesan.

Cover with foil and bake 30 minutes. Remove foil and bake another 10 minutes.

Cut and serve.


The recipe was shared with me by my neighbor and I'm not sure of its origin so I can't give proper credit. Sorry about that. Just make it your own in any small way. Get creative!

Wednesday, March 23, 2011

Braided Bread


One of my gifts to Kate for Christmas was a promise to bake bread with her. For two Saturdays now we have baked this recipe, a sweet bread. I got the recipe from Jen, a friend of mine who really ought to host baking sessions in her home and charge money for her expertise. She is really good.

Like most breads, the ingredients you need are simple. Also, like a lot of breads, time is a factor. That is, you need to carve out time to check on the bread at its various stages and attend to it as necessary. I kind of like this element because we can come back together and really be part of the whole process.

And, like most homemade breads, it tastes fabulous right out of the oven and smeared with butter, the real kind, made from cows' milk.

We have found it a good bread to use for opening our Lord's Day too.

If it happens to not be consumed beforehand.

We have bread thieves in our house that sneak pieces when no one is looking.

Saturday mornings have worked best for us to make this bread. We have managed to carry out the steps in between chores, play, and waiting in a virtual line for over two hours to buy Twins tickets for the 2011 season. Then, when our internet mysteriously "went down" and I was forced to start all over from square one in the virtual line and missed the chance for Yankees vs. Twins tickets on my birthday, I about died. Another two hour wait until I reached the front of the line. Then the clock started ticking and I had to re-group, check and re-check out calendar for alternative dates. It was slim pickings by that time. Next year I am camping out in front of the computer to get a better place in the virtual line. Maybe an iPad would help ease the pain of this loss?

Wait a minute. Was I talking about bread?

Oh yes, baking bread is a great way to spend time with your daughter...that's the point here.

And, here is the recipe.

Ingredients
1 c. warm water
2 pk. yeast
2/3 c. sugar
4-5 c. flour
1 stick of butter, the real kind, from cows' milk
2 eggs
1 1/2 tsp. salt
egg wash (Kate's favorite part, well, a close second to the kneading)

Directions

Mix water, yeast, 1/3 c. sugar and 2 c. flour in a bowl. Let rise 20 minutes.
(I warm up my oven for a few minutes, then turn it off for the rising process. I cover the bowl with plastic wrap and a towel.)

Meanwhile, combine 2 c. flour, 1/3 c. sugar, and salt. Cut in butter.

Add eggs to yeast mixture and then work in flour mixture. Knead and add up to one cup flour. It should be a sticky dough.

Let this rise for about 1.5 hours.

Divide dough in half. Roll dough slightly and cut into three strips.
Then braid.

Like this.
This recipe makes two loaves.

We place the loaves on one large baking sheet.
Then cover and let rise another hour.

Glaze with egg wash.

Bake at 350 for 25-30 minutes.

It will look like this and you will need to use all powers of resistance to save any amount for dinner.
Good Luck!

Thursday, March 17, 2011

Fancy Fish

Our recently turned eleven year old was blessed with these as her birthday treat. Her godparents brought them over as a tasty dessrt. The idea origianted in a magazine and they copied it for all of us to enjoy.

Fancy fish up close.
Fancy fish on fire.
Fancy fish about to be devoured.
Some colored frosting, M & M's, gummy sugar candy wedges for the tails - super cute!

Sunday, March 6, 2011

Rescued

I was thankful yesterday to have something so current to share with my family and our guests as we passed around the wine and bread to open our Lord's Day meal. 

A few hours earlier, I had been anticipating Kate's Girls of Praise group coming over to sew headbands.  It was 12:53pm and I realized we were probably supposed to provide a snack for the group. The girls were expected to arrive at 1:00.

Well, we had nothing readily available. Not even some fruit to cut up. I usually keep our shallow pasta bowl filled with fruit so anyone can grab a piece for lunch or a snack.  Well, no fruit today. No munchies. Not even a few carrots to slice and divide. What would we serve? Cereal?  A can of black beans? I mean really, the cupboards were not screaming decent snack material. 

Luckily, I remembered that the day prior when I visited my friend Jill, I asked her for a recipe I had always wanted to make - No Bake Cookies. I had copied down the recipe on a post it and whipped it out praying I had the ingredients and enough time to make a batch.

Sure enough, I had just enough of both.

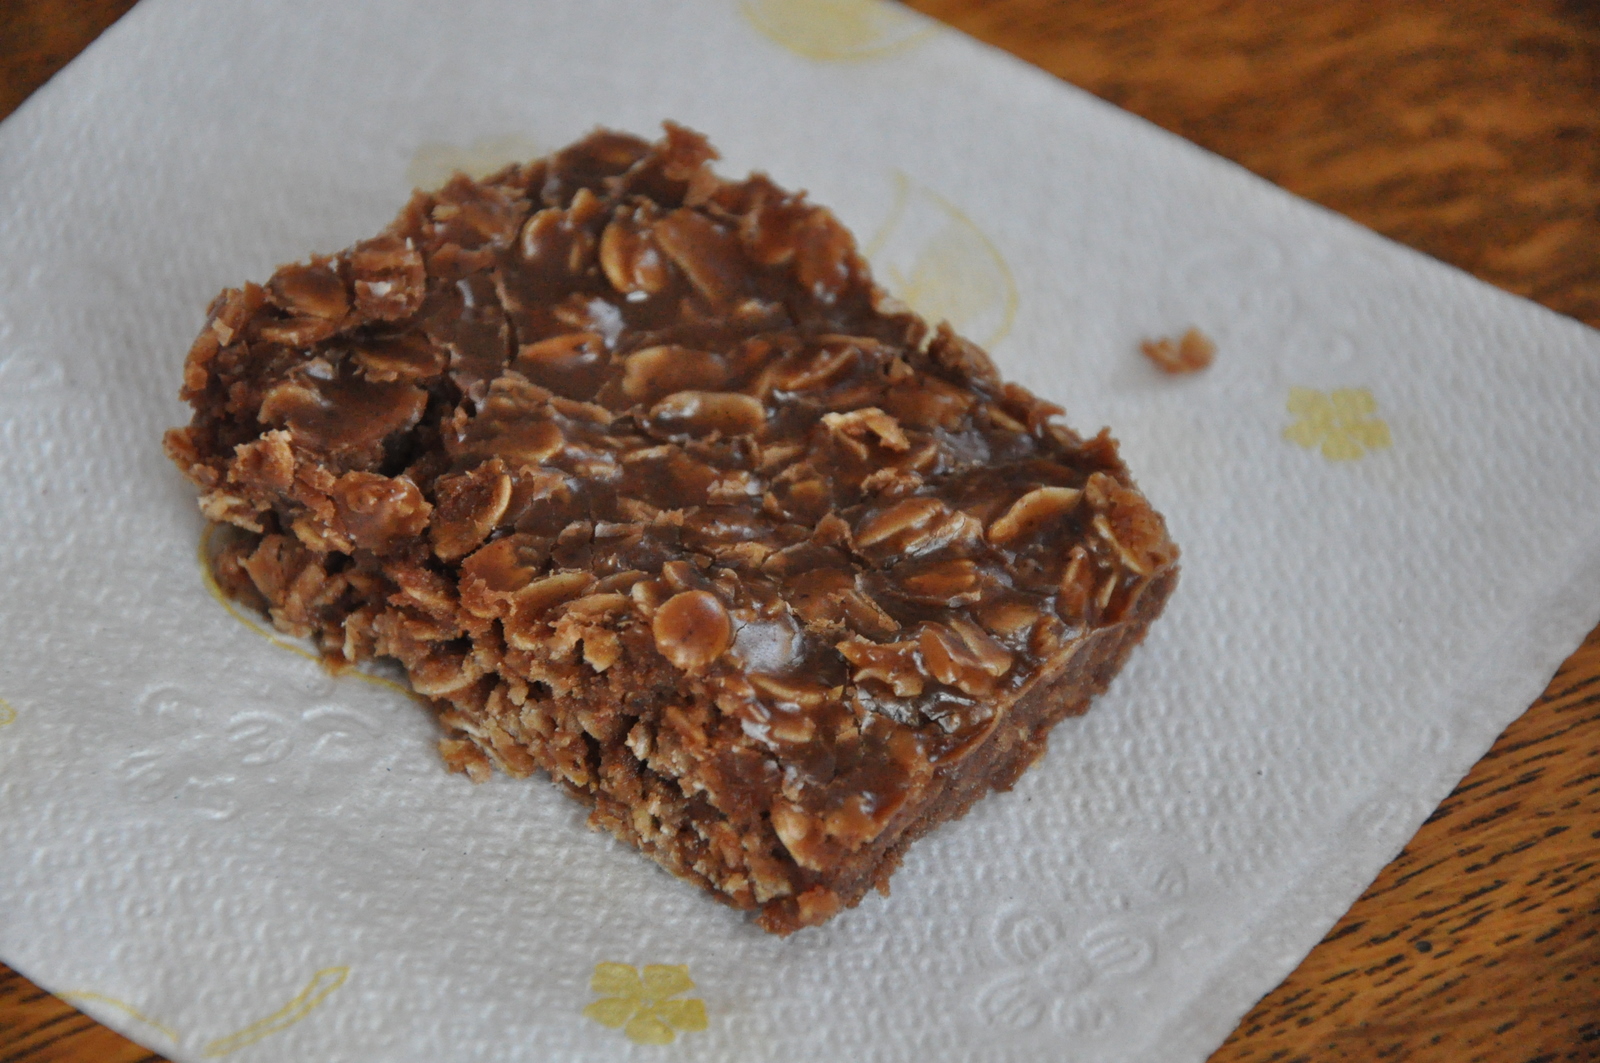
In just eight minutes I had prepared the "cookies", placed them in the fridge to cool and set and was ready to welcome our guests at about 1:02pm.

Rescue #1 was a blessing.

Rescue #2 happened minutes later and we began to cut, pin and iron pieces of fabric to sew into headbands.

While my iron light shone red, it had failed to heat. A cool iron is nobody's friend. Especially when it had been working properly the day before and had shone no signs of quitting.

Well, we needed a working iron. And fast. These six girls were on a mission to complete their project.

I called our neighbor and fellow hub member Shellee. I knew she was home and had an iron.  She was willing to lend it and even brought it over.

Rescue #2 kept us on task and provided a crucial step in completing the project.

I am blessed by the little blessings of the day and thankful I had two so close together to see the goodness of friends and neighbors.

Here is the easy and quick recipe for No Bake Cookies. Watch out though, they are addictive and really hard to have extra around!

No Bake Cookies
2 c. sugar
1/4 c. cocoa
1/2 c. milk
1/2 c. butter

Place the above ingredients in a saucepan, stir and bring to a boil. Stir and remove from heat.

To the pan add the following
1 t. vanilla
1/2 c. peanut butter
3 c. oatmeal

Stir together.

You can either plop spoonfuls of the batter onto a cookie sheet or do as I did and place all the batter into an 8 x 8 pan. I then put it into the fridge to cool and set. Then, I cut it into bars and served.

 Delicious and rich!

Thursday, December 30, 2010

Assembly Required

Kate received this cook book for Christmas. It's an Usborne title. It has step by step instructions for learning the basics of kinds of cooking, how to use kitchen tools, and preparing food with several basic recipes.

I always am on the hunt for a family friendly meal to make for our Hub dinner on Tuesdays and I had to look no further than page 12.  These are easy to make and assemble chicken/vegetable pockets that an aspiring cook can help to make. This time, Maddie had signed up on the job list to "help mom make dinner."  This was a fun one for her to learn as it required some assembly, chopping (most of which I did) and rinsing and drying the chicken.

We simply used:
  • half of a white onion, chopped
  • one green, one red, one orange and one yellow pepper, cut into strips
  • boneless chicken thighs and boneless chicken breasts cut in half (to which Maddie inquired, "Chickens have breasts?". 
  • We assembled the ingredients into pockets of tin foil.
We then topped each pocket with a pat of butter, and a  pinch of salt and pepper. We put the pockets on baking sheets in the oven at 400 degrees for about one hour. The chicken was moist and the peppers were tender and delicious.
An easy meal for the hub and one that worked well for kitchen help.